#84810 Russian KV-1 Model 1941 “KV Small Turret” Tank
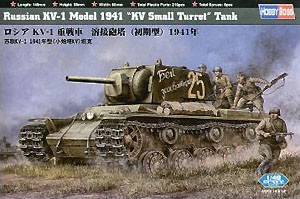
Built from the box, this kit represents a KV-1 Model 1940 from May/June 1941 with early welded turret and F-32 gun. The turret molding includes the ring-shaped weld marks characteristic of vehicles built at ChTZ in Chelyabinsk. This kit is a 1/48 scale re-engineered version of Trumpeter kit #00356, and most of the comments made for that kit are also applicable to this kit.
The kit includes a hull with regular curved rear overhang, pressed steel two-part resilient road wheels, pressed steel rubber rimmed return rollers without reinforcing ribs and early pattern drive sprockets with 16 hub retaining bolts. All of these features are appropriate for a Model 1940 produced from the spring of 1941.
The lower hull sides include faint raised lines that define the location of the hull ehkrany for kit #84811. These must be gently removed with a blade or fine file.
Fender stowage consists of three revised large rectangular stowage boxes which were fitted to the KV-1 Model 1940 from late January 1941 onward. The instructions direct you to mount the boxes on the numbers 7, 8 and 10 stations, which is the correct configuration for vehicles fitted with these boxes. The cross-cut saw and its stowage bracket are included for the number 5 station, as is the cylindrical stowage tube for the barrel cleaning rods for the number 6 station. Most if not all vehicles fitted with the revised stowage boxes carried the saw and its bracket inside the lid of the box on the number 10 position, but check your references for the vehicle you intend to model.
The kit includes parts for both the creased curved and regular curved rear hull overhangs, allowing you to model a vehicle manufactured in early 1941 if you wish. However, the kit does not include early pattern radiator intake screens or initial pattern stowage boxes so you will have to obtain these from an aftermarket source. The engine compartment and transmission compartment roof plates have the correct bolt configuration.
The kit provides a domed engine access hatch with the central inspection port molded integrally with the hatch. The inspection port was not added until the end of 1941 when the engine cooling system was revised, and was seldom if ever fitted to Model 1940s. I should therefore be sanded away. The kit provides only the late pattern radiator intake screens, which are correct for a Model 1940 from the spring of 1941. The engine deck includes integrally molded louvers that are hidden by the styrene intake screens, but are useful if you wish to replace the kit parts with after-market items.
The hull crew hatch and transmission access hatches are of the early pattern with flat tops and curved edges. The milled hatch surrounds are correctly rendered, and the surround for the crew hatch is molded as a separate part to allow for later production variants. All three hatches have integrally molded internal locking bars and hinges, though the crew hatch lacks the operating lever and grab handle.
Appliqué armor plates are included for the hull front and driver’s front plate. The appliqué for the driver’s front plate is of the lower pattern which was commonly seen on Model 1940s from the beginning of June onward.
The turret is molded in multiple parts with separate side plates, front, rear and roof. The front plate includes the rectangular reinforcing plates alongside the trunnion bulges. The roof plate includes the ring-shaped weld marks characteristic of ChTZ vehicles, while the sides include the torch cut marks and weld seams. If you wish to model an LKZ vehicle, it is a relatively simple matter to remove the ring-shaped weld marks from the roof, though you should leave them on the front and rear plates since they represent alignment pins which were present on turrets manufacured by the Izhorskiy Plant for LKZ.
The recuperator housing, while correctly shaped, has a weld seam on the front face whereas on all photographs that the author has seen, the weld seam is on the sides, top and bottom. This is easy to rectify by sanding away the molded weld seam and adding a seam from rod or putty in the correct location. The gun barrel is molded as a single piece with a hollow muzzle. It is perfectly adequate but can be replaced with an aftermarket item if you desire.
